Enportal/5.4/solutions customization/developer reference/channel targeting
Overview
The process by which a channel can be used to control the contents of another channel is called Targeting Channels. This feature allows channel authors to create a source channel that can be used to initiate the loading of a specified URL into the frame of a targeted channel. This appendix contains the following sections:
- Targeting Channels on page
- Create a Targeted Channel IFrame on page
- Create a Targeted Channel Using the Channel Target Method on page
Targeting Channels
There are two methods by which you can create a targeted channel:
- Channel Target IFrame:
- Uses the TARGET frame feature in HTML supported natively by the browser. It is the easier of the two procedures, but does not automatically switch enPortal’s focus to the targeted channel unless it is in the same folder as the source channel.
- Channel Target Method:
- Uses a channel searching logic supported by the enPortal software. It automatically switches enPortal’s focus to the targeted channel regardless of location. It also allows for an existing channel to be a targeted channel and can pass parameters to the targeted channel.
If an administrator sets up a Channel Target IFrame that is not in the same folder as the source channel, when the user clicks a link in the source channel, the resulting content will be displayed in the target channel, but the user may not be aware of this because enPortal will not automatically switch focus to the folder containing the targeted channel. However, if the administrator used the Channel Target Method to create the targeted channel then enPortal will automatically switch focus to the targeted channel when a user clicks a link in the source channel.
Create a Targeted Channel IFrame
The following instructions explain how to set up a targeted channel IFrame.
Create the Target Channel
- In the System Explorer, navigate to the following location: /system/component and locate the channel entitled TargetIframe
- Copy the TargetIframe channel to the desired location.
- Open the Channel Editor for the channel you just copied by right-clicking it and selecting the Edit option. Do not modify the TargetIframe channel contained in the /system/component directory.
- On the TargetIframe tab:
- – Enter the Default URL that you would like the target channel to display initially (before it is loaded with the contents from the source channel).
- – In the TargetIframe Name field, enter the name of the target channel as you will refer to it in the source content (HTML, JSP page).
- On the General tab, enter the desired fields.
- Save the channel.
Create the Source Channel
- If a channel does not exist for the source content, then create a channel in the desired location. The source channel can be any channel type but its Base URL must contain content that you can modify (for example, an HTML or JSP page).
- Edit the source content (HTML or JSP) page by adding the following HTML code:
- <A HREF="URL" target="TargetIframe Name">Desired text</A>
- <A HREF="URL" target="TargetIframe Name">Desired text</A>
- where URL is the URL for the content to be displayed in the target channel, TargetIFrame Name is the name that you entered in the TargetIframe Name field when you created the target channel, and Desired Text is the text for the link.
Example
The requirement is to set up a target IFrame channel that first displays the Apple web page, but is then changed to the Microsoft web page when the user clicks a link in the source channel.
- For the purpose of this example, create an HTML page entitled base.html and put it in the enPortal file system in the location: PORTAL_HOME/server/webapps/enportal/custom
- In enPortal, using the System Explorer under the Advanced tab, create a new folder called TargetFolder under Explorer/Directory/deployment/Menu/Admin.
- Using the System Explorer, navigate to Explorer/Directory/system/component and copy the TargetIframe channel to TargetFolder.
- Edit the TargetIframe channel in TargetFolder by right clicking TargetIframe and selecting the Edit option.
- – In the Default URL field, enter http://www.apple.com
- – In the TargetIframe Name field enter testTargetFrame
- – Click the Save button.
- Create a source channel in TargetFolder with the following attributes:
- – Name: ChannelSource
- – Channel Type: Web/Generic URL
- – Type of Web/Generic Channel: Direct
- – URL: /enportal/custom/base.html
- – Click the Save button.
- In the portal file system, edit the base.html page and add the following HTML code:
- <A HREF="http://www.microsoft.com" target="testTargetFrame">Show Microsoft Page in Target Channel</A>
- In enPortal, navigate to the Content Manager, expand the Explorer tree to see TargetFolder, and edit the folder by clicking it. Make the following changes:
- – Folder Type: Tiled
- – On the Layout tab of TargetFolder, position the channels so that the ChannelSource is in the left column and the testTargetFrame channel is in the right column.
- – Click the Save button.
- If necessary, log out and log back in to display TargetFolder among the menu tabs. Click the TargetFolder tab to view the channels. The testTargetFrame channel should currently display the Apple page. Click the link in the ChannelSource channel and verify that the Microsoft page is displayed in testTargetFrame channel.
Create a Targeted Channel Using the Channel Target Method
This section provides instructions for creating a targeted channel using the Channel Target Method.
The Channel Target Method provides the capability of having an event in the source channel result in a change in the targeted channel with the added capability that the focus of the Portal switches to the targeted channel.
Additionally, instead of just refreshing an existing channel in a folder, you can pass in a replacement channel such that the existing channel is replaced with the one specified.
You can also use the Channel Target Method to pass parameters to the target channel. These must be appended to the URL string.
A target channel is usually contained in a folder. If the target channel is not in user's view-set, then the content of the target channel is displayed in a pop-up window. A channel is located in the virtual directory by its channel name (chanRefID) and the folder (folderName) where it resides.
Usage Syntax
The Channel Target Finder is a system-defined channel, stored in the following location: /system/component/ChannelTarget
The channel is referenced by URL (like any Portal channel) through the Portal servlet as:
http://<portal_host>:<portal_port>/enportal/servlet/pd/vdir/system/component/ChannelTarget
The target of the reference must point to the frame ChannelTargetFinder. This is a hidden frame present at the base of every LAF. It will contain JavaScript code that invokes the Channel Target Finder on the server. So, if using a link tag, the format is: <a target="ChannelTargetFinder" href="http://<portal_host>:<portal_port>/enportal/servlet/pd/vdir/system/component/ChannelTarget?chanRefID=/About¶m1=abc">
Parameters
The Channel Target Finder accepts the following URL parameters:
| Parameter | Optional/Required | Description |
|---|---|---|
| chanRefID | Required | Used to specify the channel to be targeted. This is the path name within the virtual directory, example: /home/role/myrole/Menu/test you will specify /test. |
| folderName (or viewName, deprecated) | Optional | The path of the folder to change to. The path is the location within the virtual directory, example: /home/role/myrole/Menu/folder1 you only need /folder1. If not supplied, all folders in the view-set are searched from left to right, to find the target channel and last one it finds will be the one it uses. If the folder name is supplied and the folder is in the view-set, then the folder will be searched for the channel, if not found then the channel will be searched against all folders in the view-set. Finally if the targeted channel is NOT in the view-set, the channel is displayed in a pop-up browser window or html based in-page window. |
| newChanRefID | Optional | The full path of a different channel or url to be placed in the location of the channel defined by chanRefID. Example: /deployment/Menu/About, http://www.microsoft.com, or /enportal/custom/processMyTickets.jsp |
Configuration
The Channel Target Finder uses the following configuration parameters (override in <portal_home>/webapps/enportal/WEB-INF/config/custom.properties):
| Key | Default Value | Description |
|---|---|---|
| jsp.targetChannel.useHTMLWindowWidget | false | Specify when channel targeting needs to popup the channel, what type of popup window to use: true for using html based in-page window or false for using regular browser popup window. |
| jsp.targetChannel.winWidth | 650 | Specify the width of html based in-page popup window or browser popup window. |
| jsp.targetChannel.winHeighth | 500 | Specify the height of html based in-page popup window or browser popup window. |
| jsp.targetChannel.winTop | 500 | Specify the top position of the left hand corner of html based in-page popup window or browser popup window. |
| jsp.targetChannel.winLeft | 500 | Specify the left position of the left hand corner of html based in-page popup window or browser popup window. |
| jsp.targetChannel.winShowTitle | true | Specify if the title should be visible in header bar of the html based in-page popup window. |
| jsp.targetChannel.winAllowResize | true | Specify if the html based in-page popup window can be resized. |
| jsp.targetChannel.winAllowPark | true | Specify if the html based in-page popup window can be minimized (rolled up and down). |
| jsp.targetChannel.winAllowMove | true | Specify if the html based in-page popup window can be moved by user. |
Examples of Syntax and Parameters
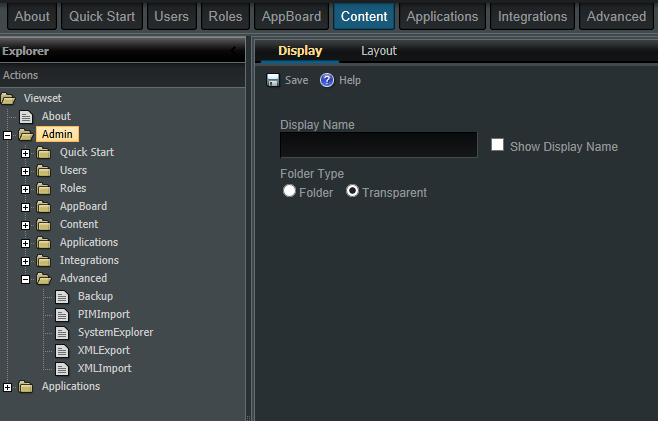
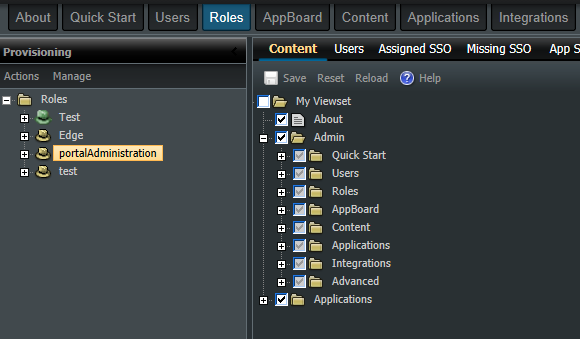
- The requirement is to a) create a link that when clicked changes the focus to the channel /home/role/myrole/Menu/Admin/Advanced/XMLImport in folder /home/role/myrole/Menu/Admin/Avanced and b) pass in a new parameter param1 with value of 100 in a role based provisioning model. Note, Admin folder is of a transparent type.
- The link would be constructed as:
- <a target="ChannelTargetFinder" href="/enportal/servlet/pd/vdir/system/component/ChannelTarget?chanRefID=/Admin/Advanced/XMLImport&folderName=/Admin/Avanced¶m1=100">
- The link would be constructed as:
- The requirement is to a) create a link that when clicked changes the focus to the channel /home/role/myrole/Menu/About, which happens to be a rendered as as part of the view-set and b) pass in a new parameter param1 with value of 100 in a role based provisioning model.
- The link would be constructed as:
- <a target="ChannelTargetFinder" href="/enportal/servlet/pd/vdir/system/component/ChannelTarget?chanRefID=/About¶m1=100">
- The link would be constructed as:
- The requirement is to a) create a link that when clicked changes the focus to the channel /home/role/myrole/Menu/Admin/Advanced/XMLImport in folder /home/role/myrole/Menu/Admin/Avanced and b) replace XMLImport with another channel: /deployment/Menu/About and pass in a new parameter param1 with value of 100 in a role based provisioning model. Note, Admin folder is of a transparent type.
- The menu link would be constructed as:
- <a target="ChannelTargetFinder" href="/enportal/servlet/pd/vdir/system/component/ChannelTarget?chanRefID=/Admin/Advanced/XMLImport&folderName=/Admin/Avanced&newChanRefID=/deployment/Menu/About ">
- The menu link would be constructed as:
- The requirement is to a) create a link that when clicked opens a popup window that will contain the specified url in the newChanRefID and b) pass in a new parameter param1 with value of 100.
- The link would be constructed as:
- <a target="ChannelTargetFinder" href="/enportal/servlet/pd/vdir/system/component/ChannelTarget?chanRefID=/Microsoft&newChanRefID=http://www.microsoft.com¶m1=100">
- The link would be constructed as:
- The requirement is to a) create a link that when clicked opens a popup window that will contain the specified custom enportal jsp in the newChanRefID and b) pass in a new parameter param1 with value of 100.
- The link would be constructed as:
- <a target="ChannelTargetFinder" href="/enportal/servlet/pd/vdir/system/component/ChannelTarget?chanRefID=/ProcessTicket&newChanRefID=/enportal/custom/processMyTickets.jsp¶m1=100">
- The link would be constructed as:


