Appboard/old/widgets/web page: Difference between revisions
imported>Jason.nicholls No edit summary |
imported>Jason.nicholls |
||
| Line 18: | Line 18: | ||
# Click <b>Next</b> to proceed to the <b>Options</b> tab. | # Click <b>Next</b> to proceed to the <b>Options</b> tab. | ||
# Enter the following information on the <b>Options</b> tab: | # Enter the following information on the <b>Options</b> tab: | ||
## [Optional] Configure the [[ | ## [Optional] Configure the [[appboard/old/options/help|Help]] Option. | ||
# Click <b>Next</b> to proceed to the <b>Actions</b> tab. | # Click <b>Next</b> to proceed to the <b>Actions</b> tab. | ||
# Click <b>Add Event Action</b> to configure one or more [[appboard/old/actions|Actions]] to be invoked when a user clicks on the Web Widget. | # Click <b>Add Event Action</b> to configure one or more [[appboard/old/actions|Actions]] to be invoked when a user clicks on the Web Widget. | ||
Revision as of 14:55, 17 July 2014
AppBoard enables the builder to create unique and custom visualizations. In some case, it is desired to include Widgets that simply present existing web content from a URL. The Web Widget provides this functionality.
How To Create a Web Widget
For instructions on creating a Widget, see the general instructions in Adding Widgets. The Web Page Widget type is located under the Web category on the Widget selection screen.
How To Configure a Web Widget
- Follow the instructions above to create the basic "Web Page" Widget.
- Enter the following information on the Data tab:
- URL: Enter a web address of the content to be displayed in the Web Widget.
- Example: http://www.edge-technologies.com
- Click Next to proceed to the Options tab.
- Enter the following information on the Options tab:
- [Optional] Configure the Help Option.
- Click Next to proceed to the Actions tab.
- Click Add Event Action to configure one or more Actions to be invoked when a user clicks on the Web Widget.
- Click Finish.
- In the Builder Modes panel, select Builder and navigate to the appropriate Board to observe the new Web Widget.
Streaming Video in a Wed Widget
Complete the following steps to configure the Web Widget to show streaming video:
- Follow the instructions from "How To Create a Web Widget" above to create the basic Web Widget.
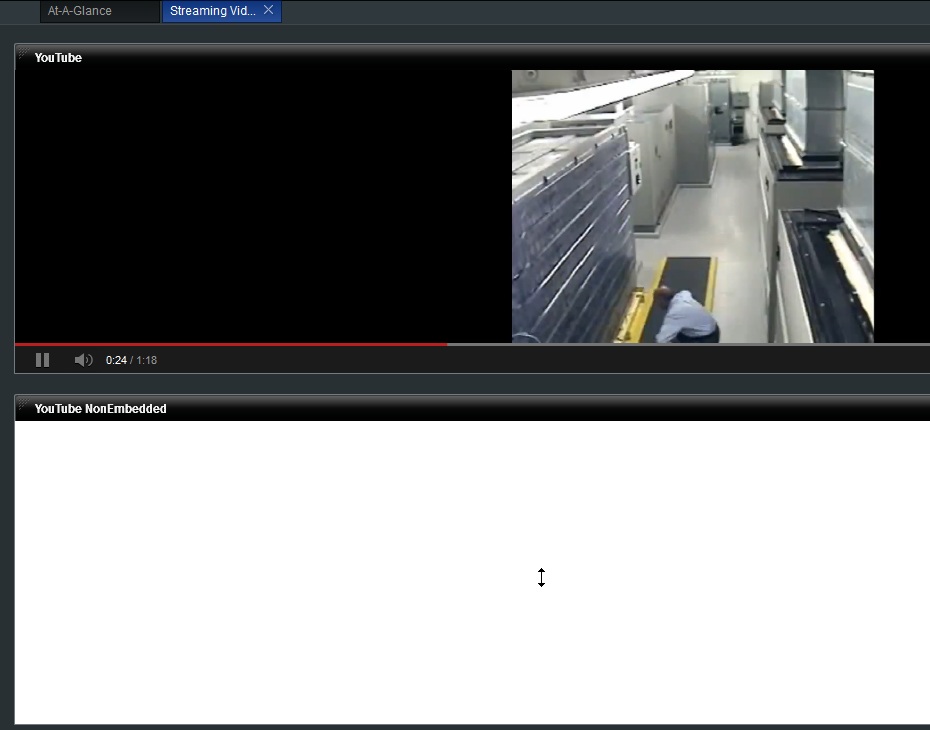
- Configure the widget by placing the URL of the embedded video in the URL field.
- Note: It is important to use the embedded form of the video to properly play back in the web widget.
- example: http://www.youtube.com/embed/Lhlhj-_7Rrc not http://www.youtube.com/watch?v=Lhlhj-_7Rrc (see figure below)
- Note: If you want youtube videos to autostart you must append "?autoplay=1" to the url
- Note: It is important to use the embedded form of the video to properly play back in the web widget.
- Go to the Builder and observe the new Web Widget with streaming video.
Launch Contextual Content in a Web Widget
By combining AppBoard and enPortal, you can create special Widgets (called "Channels") that integrate web application GUIs. For a tutorial example of using an enPortal Channel to launch contextual content from an AppBoard Web Widget, see Launching an enPortal Channel from a Widget.
Display enPortal PIM Content in a Web Widget
enPortal PIMs provide out-of-the-box integration of web application GUIs. You may want to display an enPortal channel on a Board in AppBoard. For a tutorial example of using an enPortal Channel to display an integration application GUI in an AppBoard Web Widget, see Display PIM Content in a Web Widget.

