Appboard/2.5/builder/system administration/themes: Difference between revisions
imported>Jason.nicholls No edit summary |
imported>Jason.nicholls |
||
| Line 8: | Line 8: | ||
This page contains general instructions for creating and managing Themes in AppBoard. | This page contains general instructions for creating and managing Themes in AppBoard. | ||
[[File:appboard-2.4-theme-manager.png|frame|center|Theme Manager administration page]] | |||
== Base Themes == | == Base Themes == | ||
Revision as of 09:39, 30 July 2014
Overview
An AppBoard Theme is a collection of settings that manage the overall visual presentation of the application to the end-user in the web browser. Elements included in a Theme include colors, button styles, shadows, borders, backgrounds, and so on.
Multiple Themes can be configured in an AppBoard system. One Theme is in place at any given time. For example, you could create four seasonal Themes, and change the selected Theme once every three months to give the system a fresh look.
This page contains general instructions for creating and managing Themes in AppBoard.
Base Themes
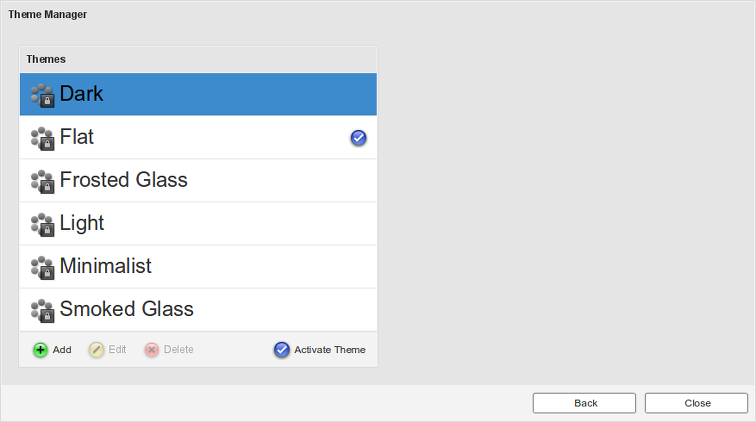
AppBoard ships with several base themes:
- Dark
- Flat
- Frosted Glass
- Light
- Minimalist
- Smoked Glass
Base themes are not editable, and are shown in gray with a lock icon, to help differentiate from custom themes that can be edited.
Managing Themes
Perform the following to manage Themes:
- Log in to AppBoard Builder as an administrator.
- In the Builder Modes panel, select System Administration, then select Theme Manager. This will launch the Theme Manager panel.
To activate a theme, select a theme from the list of available themes, and click the "Activate Theme" option in the bottom toolbar. The checked theme indicates the currently active theme.
Creating a New Custom Theme
Perform the following steps to create a new Theme:
- Click "Add" in the bottom toolbar. This will launch the "Theme Editor".
- Enter a name for the new Theme to be created.
- Click "Add Theme".
- The Theme is created with a set of default settings.
- Modify the Theme as desired, and then click "Save Changes" to save the changes to the Theme.
- Apply the theme to the system, if desired, by clicking "Activate Theme" in the bottom toolbar.
Deleting a Theme
Perform the following steps to delete a Theme:
- Select the Theme from the list of available Themes.
- Click "Delete" in the bottom toolbar.
Editing a Theme
Perform the following steps to edit the settings for a Theme:
- Select the Theme from the list of available Themes.
- Click "Edit" in the bottom toolbar. This will launch the "Theme Editor".
- Modify the Theme as desired, and then click "Save Changes" to save the changes to the Theme.
- Apply the Theme to the system, if desired, by clicking "Activate Theme" in the bottom toolbar.
Using the Theme Editor
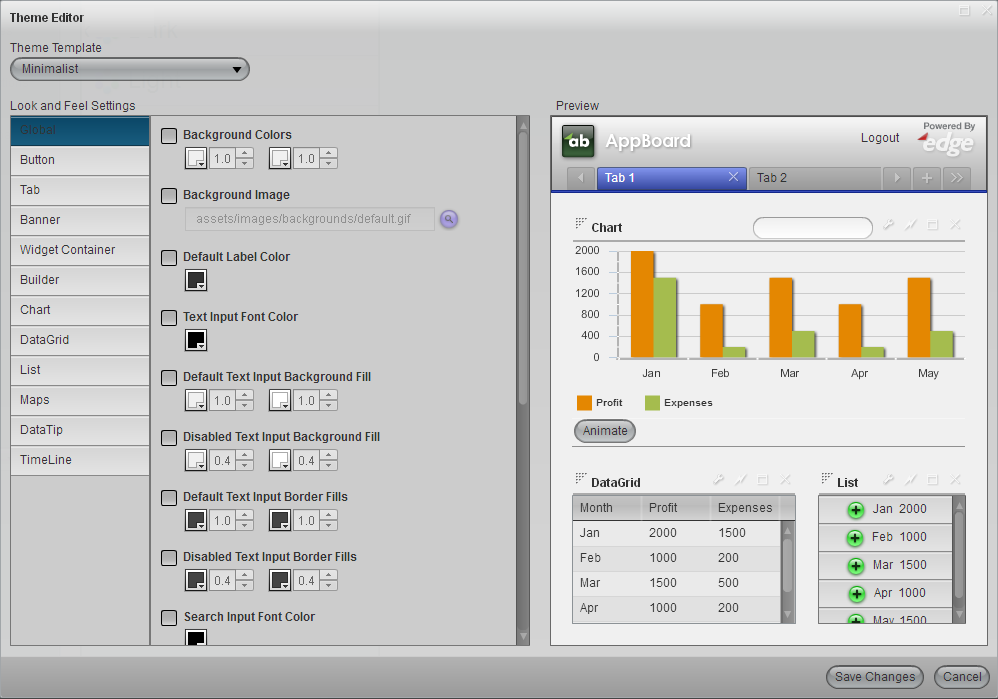
An AppBoard theme is a collection of overrides for a default set of attributes. Rather than build up a Theme from scratch, AppBoard Themes start with default values pre-populated from a template. AppBoard ships with a number of base themes to provide a range of starting points.
To get started, select a Theme Template using the pull-down selector at the top of Theme Editor. The base template is all that is required for a Theme. A new Theme without any overrides is basically just a copy of the Theme Template.
By selecting a different Theme Template, you will swap out the base values used by the current Theme. Any overrides configured as part of your new Theme will persist; however, the values used in your overrides may no longer make sense after you have switched from a "Dark" theme to a "Light" theme.
Attribute Overrides
Theme-able elements are organized into categories, which can be selected using the list on the left side of Theme Editor.
Each attribute has a default value that it inherits from its template. To provide an override for that value, check the check box next to the desired attribute. If you decide you do not like the new values you entered, uncheck the checkbox next to the attribute, and the theme will return to its default value.
Details on certain options for attribute overrides are available in the theme configuration detail page.
Migrating Custom Themes
Perform the the following steps to export a custom theme:
- Log in to AppBoard as an administrator.
- Click "System Administration" to open the System Administration panel on the right.
- Click "Backup" to open the Backup screen.
- Click "Create" and select "Backup AppBoard" or "Backup All". For more information on backups, see Backup and Recovery.
The above steps will create an archive of AppBoard settings in [AppBoard_Home]\server\webapps\enportal\WEB-INF\archive\.
Inside this archive, located at [AppBoard_Home]\server\webapps\enportal\WEB-INF\xmlroot\appboard\config, will be a file named "themes.xml".
Importing a custom theme from another AppBoard installation will require collecting the "themes.xml" file as shown above.
It will also be prudent to collect the associated image files, typically found in [AppBoard_Home]\server\webapps\enportal\visualizer\assets\images (include ".\backgrounds" as well) from the source AppBoard installation.
Once all associated files are collected, perform the following steps on the target AppBoard installation:
- Shut AppBoard down, if running.
- Copy the “themes.xml” file (that you captured in the section above) to [AppBoard_Home]\server\webapps\enportal\WEB-INF\xmlroot\appboard\config\.
- Copy the image files to [AppBoard_Home]\server\webapps\enportal\visualizer\assets\images\ and .\backgrounds\ (if any backgrounds were used).
- Start AppBoard.
- Log in to AppBoard and within Builder, click System Administration|Theme Manager to see that the new theme has been imported.


